Table of Contents
Home EV Charger Installation: The Complete Guide
The convenience of waking up every morning to a fully charged electric vehicle (EV) is one of the greatest benefits of EV ownership. Public DC fast charging is excellent for highway travel, but relying on public infrastructure for daily driving can lead to long wait times, high commercial electricity rates, and increased battery wear. Installing a home EV charger is a highly cost-effective and convenient way to power your electric vehicle.
Setting up a home charging station requires careful planning. This comprehensive, step-by-step guide covers the technical specifications, structural electrical demands, safety protocols, and cost structures of a residential installation.
1. Understanding Residential EV Charger Types
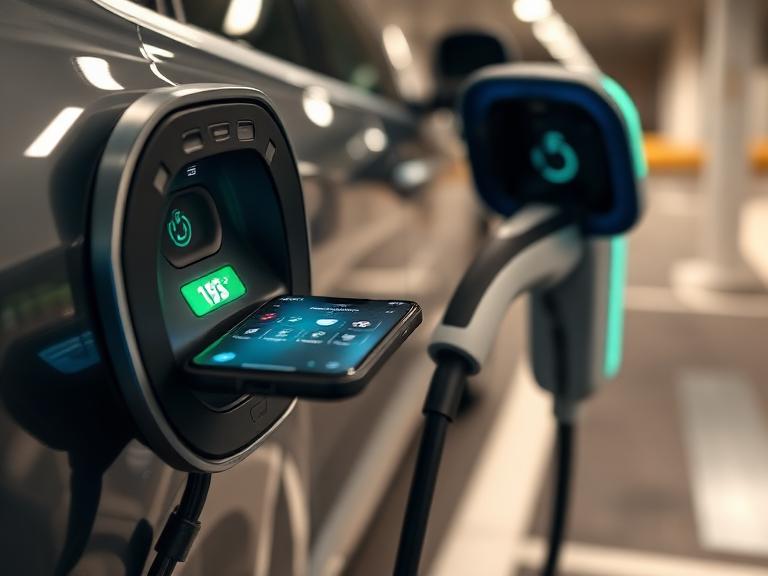
Before purchasing equipment or hiring an installer, you must select the charger class that best matches your daily mileage and your home’s electrical capacity.
                          [ HOME EV CHARGING METHODS ]
                                       |
       +-------------------------------+-------------------------------+
       |                               |                               |
       v                               v                               v
 [ LEVEL 1 (Slow AC) ]         [ LEVEL 2 (Standard AC) ]     [ DC FAST (Commercial) ]
  - 15A / 230V Socket           - Dedicated Wallbox           - 3-Phase Industrial Grid
  - 2.5 kW – 3.3 kW             - 7.4 kW – 22 kW              - 25 kW – 150 kW+
  - 15–20 km range/hr           - 35–120 km range/hr          - NOT SUITABLE FOR HOME
Level 1 Charging: The Emergency Backup (2.5 kW – 3.3 kW)
Almost every new EV comes bundled with a portable Level 1 charging cable. This cable plugs directly into a standard, grounded domestic 15-amp, 230-volt socket.
- Charging Rate: Adds approximately 15 to 20 km of range per hour of charging.
- Suitability: Best for plug-in hybrid electric vehicles (PHEVs) with small batteries or drivers with short daily commutes (under 30 km) who can charge their vehicle overnight for 10 to 12 hours.
- Infrastructure Cost: Virtually zero, assuming you already have a high-quality, grounded 15A socket.
Level 2 Charging: The Golden Standard (7.4 kW – 22 kW)
A Level 2 wallbox charger is the standard setup for most EV owners. These permanently mounted units require a dedicated circuit run directly from your home’s main distribution board.
- 7.4 kW Single-Phase Setup: Draws approximately 32 Amps on a standard 230V connection. It adds 35 to 45 km of range per hour, replenishing a typical 40 kWh battery (like a Tata Nexon EV or MG ZS EV) from 10% to 100% in 5 to 6 hours.
- 11 kW to 22 kW Three-Phase Setup: Draws 16 to 32 Amps across three phases (415V). These systems add 60 to 120 km of range per hour but are limited by your car’s On-Board Charger (OBC) and your property’s electrical service capacity.
- Suitability: Recommended for all battery electric vehicles (BEVs).
DC Fast Charging: Why It Does Not Belong at Home
Public fast-charging plazas use high-capacity Direct Current (DC) systems that range from 50 kW to over 350 kW. DC fast chargers are not suitable for residential installations because:
- Grid Demands: They require dedicated 3-phase high-tension (HT) industrial grid connections, often necessitating a private transformer.
- Prohibitive Capital Cost: System and installation costs easily exceed ₹5,00,000 to ₹15,00,000.
- Battery Health: Frequent DC fast charging bypasses the vehicle’s thermal management safety checks, accelerating battery degradation over time.
2. Technical Prerequisites & Electrical Infrastructure
Before installing a Level 2 wallbox charger, you must ensure your home’s electrical system can safely handle the increased load.
Step 1: Calculate Your Current Load Capacity
Every residential property is assigned a Sanctioned Load (expressed in kW or kVA) by the local utility distribution company (DISCOM).
- The Baseline Rule: Your total household load—including major appliances like air conditioners, geysers, induction cooktops, and the new EV charger—must not exceed your sanctioned load limit.
- Load Balancing Calculation:$$\text{Available Load Margin} = \text{Sanctioned Load} – \text{Peak Active Household Demand}$$If your home has a sanctioned load of 10 kW and your peak active household demand (with ACs and geysers running) is 4 kW, you have a margin of 6 kW. Installing a 7.4 kW charger under these conditions requires upgrading your sanctioned load to prevent tripping the main grid fuse.
Step 2: Apply for a Load Upgrade
If your calculation reveals your current capacity is insufficient, you must apply to your local DISCOM for a load enhancement.
- The Smart Meter Path: Many states now offer dedicated, subsidized EV tariff meters. Applying for an independent EV meter separates your vehicle’s energy consumption from your household billing, helping you avoid higher, progressive residential billing tiers.
3. Step-by-Step Home EV Charger Installation Process
Installing a Level 2 wallbox charger is an involved electrical project. It should always be performed by a certified electrical technician or an installer approved by the manufacturer.
1.Comprehensive Site Survey:Day 1.
A technician evaluates your main electrical panel, measures the physical distance to your parking bay, and identifies the best path for routing cable conduits.
2.Infrastructure Upgrades & Permits:Days 2-4.
If necessary, file for a load enhancement with your DISCOM. In apartments or housing societies, secure a formal No Objection Certificate (NOC) from the Resident Welfare Association (RWA).
3.Conduit Routing & Cabling:Day 5 (Morning).
Route heavy-duty, outdoor-rated conduits from your main meter or distribution panel to your parking bay. Pull premium armored copper cables through the conduits (a minimum of 6 $mm^2$ is required for a 32A, 7.4 kW charger).
4.Safety Switchbox Installation:Day 5 (Midday).
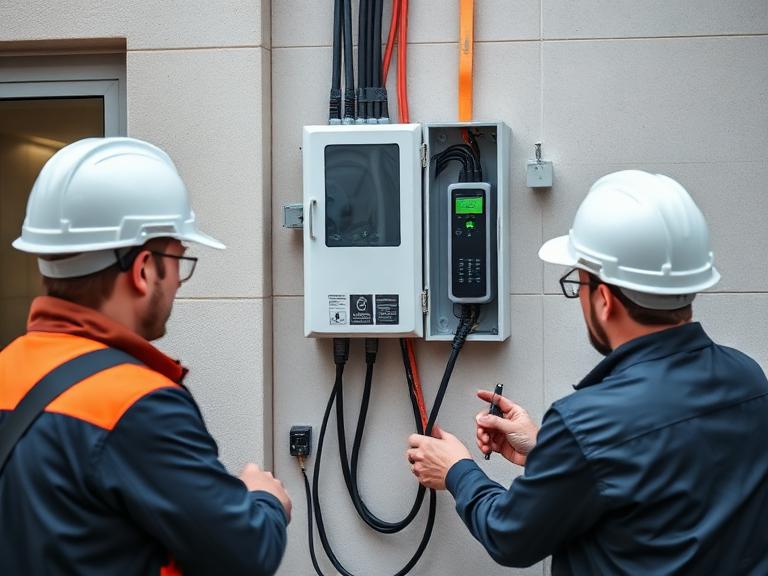
Mount a dedicated, weatherproof sub-distribution box near your parking space. Install safety devices inside, including a dedicated 32A Miniature Circuit Breaker (MCB) and a 30mA Type B Residual Current Circuit Breaker (RCCB).
5.Dedicated Grounding (Earthing):Day 5 (Afternoon).
Create a dedicated chemical earthing pit near the charging station. Connect the ground wire to the charger to ensure any electrical faults are safely diverted into the earth.
6.Charger Mounting & Wiring:Day 5 (Late Afternoon).
Securely mount the wallbox charger onto a solid brick wall or a steel pedestal stand at a height of 1.2 to 1.5 meters from the ground. Connect the incoming power, neutral, and ground wires to the charger’s terminal blocks.
7.Commissioning, Testing & Handover:Day 5 (Evening).
Energize the circuit and use an EVSE tester or a digital multimeter to verify voltage levels, phase configuration, and ground resistance. Perform a live test session with your vehicle and sync any smart companion apps.
4. Key Safety Standards & Electrical Protections
A home charger handles sustained, high-current loads over several hours, making robust electrical safety standards non-negotiable.
+-------------------------------------------------------------------------+
|                  REQUIRED SAFETY AND PROTECTION STACK                   |
+-------------------------------------------------------------------------+
|  [Incoming Grid Power]                                                  |
|           |                                                             |
|           v                                                             |
|  [Surge Protection Device (SPD)]   --> Shields against lightning spikes |
|           |                                                             |
|           v                                                             |
|  [Miniature Circuit Breaker (MCB)] --> Limits thermal overload / shorts |
|           |                                                             |
|           v                                                             |
|  [Type B RCCB (Residual Current)]  --> Detects dangerous AC & DC leaks  |
|           |                                                             |
|           v                                                             |
|  [Chemical Ground Pit (< 1 Ohm)]   --> Safeguards against shock hazards |
+-------------------------------------------------------------------------+
1. Overcurrent and Short-Circuit Protection (MCB)
Your sub-distribution panel must feature an MCB rated at least 125% of the charger’s maximum current draw. For a 32-Amp continuous-load charger, you must use a 40-Amp MCB to prevent nuisance tripping caused by thermal expansion during long charging sessions.
2. Earth Leakage Protection (The Critical Type B RCCB)
Standard household residual current breakers (Type A or AC) are designed to detect basic AC ground leaks. However, an EV’s internal charging system converts AC to DC, which can leak smooth DC fault currents back into your home’s wiring.
Warning: DC leakage can “blind” a standard Type A breaker, preventing it from tripping during an electrical fault. You must install a Type B RCCB (30mA sensitivity) or a dedicated Residual Direct Current Detecting Device (RDC-DD) to ensure both AC and DC ground faults are safely detected.
3. Dedicated Chemical Grounding (Earthing)
Many modern EVs will refuse to initiate a charging session if their onboard computer detects weak or high-resistance grounding.
- The Standard: Ensure your installer sets up a dedicated chemical earthing pit using copper-bonded or hot-dip galvanized electrodes backfilled with bentonite clay.
- Measurement: The electrical resistance between the neutral and ground lines must be verified using an earth tester and must remain strictly below 1.0 Ohm under all weather conditions.
4. Surge Protection Device (SPD)
Grid fluctuations and lightning strikes can send transient overvoltage spikes through your home’s wiring, which can damage your charger’s sensitive control boards. Installing a Class II SPD inside your charging panel helps protect your investment from these unexpected surges.
5. Cost Analysis: Home EV Charger Installation in India (2026)
The total cost of installing a home EV charger depends on the capacity of the unit, the distance from your main meter to your parking spot, and any necessary grid upgrades.
| Component | Cost Range (3.3 kW AC Setup) | Cost Range (7.4 kW AC Setup) | Purpose & Specifications |
| EVSE Charger Unit | ₹15,000 – ₹25,000 | ₹25,000 – ₹50,000 | Wallbox hardware with safety certifications (IP55/IP66, ARAI). |
| Armored Cabling | ₹3,000 – ₹6,000 | ₹6,000 – ₹18,000 | Heavy-duty copper cable (3-core 6 $mm^2$ to 10 $mm^2$). |
| Safety Switchgear | ₹2,000 – ₹4,000 | ₹5,000 – ₹10,000 | Weatherproof enclosure containing MCB, Type B RCCB, and SPD. |
| Chemical Earthing | ₹4,000 – ₹6,000 | ₹5,000 – ₹8,000 | Dedicated chemical grounding electrode and backfill compound. |
| Labor & Civil Work | ₹3,000 – ₹5,000 | ₹4,000 – ₹8,000 | Conduiting, drilling, mounting, terminal wiring, and final testing. |
| Total Typical Cost | ₹27,000 – ₹46,000 | ₹45,000 – ₹94,000 | Fully configured, code-compliant residential setup. |
Factors That Can Increase Your Installation Costs
- The Cable Run Distance: Charging units are typically priced with a standard 5-meter installation kit. If your parking bay is far from your electrical meter room (especially in larger apartment complexes), routing extra armored cable can add ₹250 to ₹450 per meter.
- Grid Upgrades: If your local DISCOM requires a transformer upgrade or charges high fees to increase your sanctioned load, your upfront costs will be higher.
- Smart Connectivity: Chargers equipped with advanced features like RFID access cards, Wi-Fi, 4G SIM cards, and smart app integration typically carry a premium over basic plug-and-charge models.
6. Real-World Operating Economics & ROI
Charging an EV at home is significantly more economical than running a traditional petrol or diesel car.
The Numbers: Standard Driving vs. EV Driving
Consider a typical monthly driving routine of 1,500 km:
- Petrol Car Scenario:
- Average Fuel Economy: 15 km/liter
- Fuel Consumption: 100 liters
- Petrol Price: ₹105 per liter
- Total Monthly Cost: ₹10,500
- Electric Vehicle Scenario (Home Charged):
- Average Real-World Efficiency: 7.5 km per unit (kWh) of electricity
- Total Electricity Required: 200 Units (kWh)
- Average Domestic Tariff (e.g., Delhi, Mumbai, Bengaluru): ₹7.50 per unit
- Total Monthly Cost: ₹1,500
$$\text{Monthly Fuel Savings} = \text{₹10,500} – \text{₹1,500} = \text{₹9,000 per month}$$
At a monthly savings of ₹9,000, a high-end 7.4 kW home charger installation costing ₹60,000 completely pays for itself in less than 7 months.
7. The Solar Charging Advantage
If your home is equipped with a solar rooftop system, you can integrate your solar generation with your EV charger to drive your operating costs down to near zero.
+-------------------------------------------------------------------------+
|                  SOLAR-EV INTEGRATION SYSTEM FLOW                       |
+-------------------------------------------------------------------------+
|     [Solar Panels]                   [Utility Grid]                     |
|           |                                 |                           |
|           +----------------+----------------+                           |
|                            |                                            |
|                            v                                            |
|                  [Smart Hybrid Inverter]                                |
|                            |                                            |
|           +----------------+----------------+                           |
|           |                                 |                           |
|           v                                 v                           |
|    [Home Appliances]               [Smart EV Charger]                   |
|                               (Configured for Green Charging)           |
+-------------------------------------------------------------------------+
Green Charging Mode
Advanced smart chargers feature “Green Charging” modes that communicate directly with your solar inverter.
- How It Works: Rather than drawing power from the grid, the charger monitors your solar generation in real time. If your solar panels are producing 4 kW of excess energy, the charger limits its draw to exactly 4 kW.
- Financial Impact: Charging your vehicle entirely with self-generated solar power allows you to bypass grid tariffs entirely, shielding you from future utility rate increases and ensuring your driving is 100% emissions-free.
8. Navigating Apartment & Housing Society (RWA) Approvals
Installing a personal EV charger in a shared residential building or housing society requires coordinating with your Resident Welfare Association (RWA).
Step 1: Secure Your Parking Rights
To install a charger, you must own or hold a long-term lease on a designated, covered parking space on the property.
Step 2: Request an Electrical Audit
Before presenting your request to the RWA, have a certified electrician conduct a brief electrical audit of the building’s common meter room.
- Ensure there is adequate space in the common shafts to route your armored power cables up to your parking space.
- Verify that the building’s main distribution transformer has enough spare load capacity to accommodate additional EV connections.
Step 3: Present an RWA Approval Pack
Prepare a professional proposal for your RWA board that includes:
- A copy of the manufacturer’s charger specification sheet, highlighting its safety certifications (such as an IP55 weatherproof rating and CE/ARAI compliance).
- Your electrical layout diagram, detailing the path of your proposed armored cable run, conduits, and dedicated Type B RCCB safety breakers.
- A signed commitment letter stating that you will cover all installation, cabling, maintenance, and electricity consumption costs.
9. Comprehensive Pre-Installation Checklist
Use this practical checklist to track your home EV charger project and ensure no details are missed:
[ ] Sync Companion Apps: Connect your charger to your home Wi-Fi and configure any scheduled charging times to take advantage of lower off-peak utility tariffs
[ ] Verify Sanctioned Load: Confirm your home’s current sanctioned load is sufficient to support your household appliances plus the new charger.
[ ] Choose the Charger Capacity: Select either a single-phase 7.4 kW wallbox or a three-phase 11/22 kW wallbox, matching your car’s onboard charger capacity.
[ ] Check Weatherproofing: Ensure your chosen charger carries at least an IP55 rating if it will be installed in an open or outdoor parking spot.
[ ] Secure Approvals: Obtain any necessary NOCs from your RWA, building management, or landlord.
[ ] Verify Cable Specifications: Confirm your installer is using thick, high-quality armored copper cables (minimum 6 $mm^2$ for a 7.4 kW charger) to handle the continuous current.
[ ] Install Dedicated Earthing: Set up a dedicated chemical earthing pit specifically for the charger, ensuring resistance measures under 1.0 Ohm.
[ ] Check Safety Switchgear: Confirm your dedicated charging panel includes a 40A MCB, a 30mA Type B RCCB, and a Class II Surge Protection Device.