Table of Contents
Bathroom Renovation Checklist for Homeowners | Step-by-Step Playbook
Embarking on a bathroom makeover is one of the most impactful home improvement investments you will make. It elevates your daily living comfort, enhances personal hygiene, and adds substantial market value to your property. However, a bathroom is also the most technically complex room in any residence—a high-density intersection of structural civil work, concealed high-pressure plumbing, electrical wiring, and standing water.
Without a comprehensive, step-by-step Bathroom Renovation Checklist for Homeowners, what should be an exciting home improvement project can quickly turn into a frustrating experience. Common pitfalls include unexpected budget overruns, missed waterproofing steps, poor spatial clearances, and ongoing subfloor leaks that damage neighboring rooms.
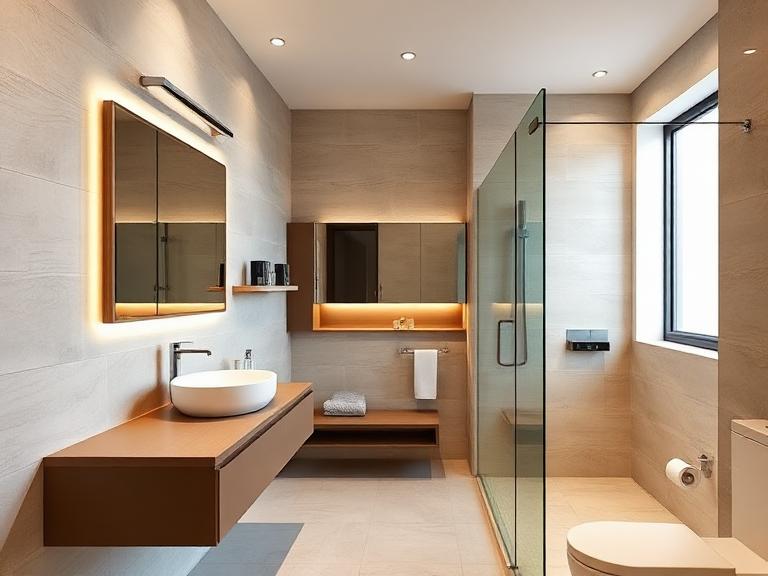
This master checklist provides homeowners with a complete architectural, civil, and quality management playbook. Divided into 8 structured phases—from pre-demolition diagnostics to final sign-off—this guide empowers you to manage contractors, verify materials, and ensure a durable, leak-proof bathroom transformation.
The 8-Phase Master Renovation Framework
[ PHASE 1: DIAGNOSTIC AUDIT ] ──> [ PHASE 2: SPATIAL PLAN & 3D ] ──> [ PHASE 3: BUDGET ALLOCATION ]
                                                                                   │
[ PHASE 6: SURFACES & FINISHES] <── [ PHASE 5: WATERPROOFING ] <── [ PHASE 4: CIVIL & PLUMBING ]
          │
          ▼
[ PHASE 7: FIXTURE COMMISSIONING ] ──> [ PHASE 8: QUALITY HANDOVER ]
Phase 1: Pre-Demolition Diagnostic & Infrastructure Checklist
Before hiring contractors or purchasing surface materials, audit the existing bathroom footprint to identify hidden structural issues and avoid unexpected costs.
+---------------------------------------------------------------------------------------------------+
|                        PHASE 1: PRE-DEMOLITION DIAGNOSTIC CHECKLIST                               |
+---+----------------------------------+------------------------------------------------------------+
| # | Inspection Parameter             | Verification Requirement & Action                          |
+---+----------------------------------+------------------------------------------------------------+
| 1 | Concealed Supply Pipe Type       | Identify if pipes are GI, PVC, CPVC, or PEX. Legacy GI     |
|   |                                  | lines (>10 yrs) must be marked for complete removal.       |
| 2 | Static Water Pressure            | Measure Bar pressure at main outlet using a gauge.         |
|   |                                  | If pressure is <2.0 Bar, plan for a booster pump.          |
| 3 | Water Hardness (TDS & pH)        | Test TDS levels. If >500 PPM, specify PVD anti-tarnish     |
|   |                                  | brassware and inline water softeners.                      |
| 4 | Thermal Leak Detection           | Scan adjacent bedroom walls using thermal cameras for      |
|   |                                  | hidden dampness or capillary moisture signatures.          |
| 5 | Concrete Slab Structure          | Determine if the room uses a sunken slab (12-18" drop) or  |
|   |                                  | flat slab with raised platforms.                           |
| 6 | Drain Stack Slope & Venting      | Check soil and waste stack positions (110mm / 75mm) and     |
|   |                                  | confirm proper air venting to prevent foul odors.          |
| 7 | Electrical Load Capacity         | Verify main distribution breaker amperage for geysers      |
|   |                                  | (2kW-3kW), exhaust fans, and smart bidet seats.            |
+---+----------------------------------+------------------------------------------------------------+
Phase 2: Architectural Layout & Ergonomic Planning Checklist
A visually pleasing bathroom fails if spatial ergonomics are ignored. Ensure your design plans adhere to these mandatory architectural clearance metrics:
                          [ MANDATORY CLEARANCE METRICS ]
                                         │
         ┌───────────────────────────────┼───────────────────────────────┐
         ▼                               ▼                               ▼
[ WATER CLOSET (WC) ]           [ SHOWER ENCLOSURE ]            [ VANITY STATION ]
  • Min 30" width clearance       • Min 30" x 30" wet zone        • Min 30" width clearance
  • Min 21" front legroom         • 36" x 36" recommended size    • 18" to 22" depth profile
  • Centerline 15" from wall      • 1:100 floor fall to drain     • Countertop height 32" to 34"
Architectural Layout Sign-Off Checklist
- [ ] Door Swing Clearance: Confirm the door opening path (30 to 32 inches minimum) clears the vanity cabinet and toilet bowl without obstruction.
- [ ] Wet-and-Dry Zone Partition: Plan a frameless 8mm or 10mm toughened glass partition or sliding panel to confine shower spray to the wet zone.
- [ ] In-Wall Storage Recesses: Map out 4-inch deep tiled shower niches inside wall cavities to eliminate protruding wire caddies.
- [ ] Concealed Cistern Alignment: Verify wall cavity depth (6 to 8 inches) for embedding in-wall steel toilet flush frames.
Phase 3: Financial Budgeting & Material Allocation Checklist
Establishing a clear financial budget prevents scope creep and ensures proper allocation across materials, labor, and safety contingencies.
+-------------------------------------------------------------------------------+
|                       RECOMMENDED BUDGET ALLOCATION                           |
+-----------------------------------+-------------------------------------------+
| Renovation Category               | Target Budget Share (%)                   |
+-----------------------------------+-------------------------------------------+
| Sanitaryware & Metallic Faucets   | 28% – 32%                                 |
| Wall & Floor Cladding (Tiles/Slabs)| 20% – 24%                                 |
| Civil Labor, Demolition & Masonry | 16% – 18%                                 |
| Concealed Plumbing & Electricals  | 12% – 14%                                 |
| Custom Vanity & Glass Partition   | 10% – 12%                                 |
| Waterproofing & Chemical Testing  | 5% – 6%                                   |
| Contiguity Contingency Buffer     | 5%                                        |
+-----------------------------------+-------------------------------------------+
Material Specification Standard Checklist
+---------------------------------------------------------------------------------------------------+
|                                 MATERIAL SELECTION STANDARDS                                      |
+-----------------------+------------------------------------+--------------------------------------+
| Component Category    | High-Performance Standard          | Materials to Avoid                   |
+-----------------------+------------------------------------+--------------------------------------+
| Vanity Core Cabinetry | 100% Waterproof WPC / BWP 710 Ply  | Commercial MDF, Particle Board, HDMR |
+-----------------------+------------------------------------+--------------------------------------+
| Countertop Surfaces   | Engineered Quartz, Sintered Stone  | Porous Unsealed Natural Marble       |
+-----------------------+------------------------------------+--------------------------------------+
| Metallic Faucet Finish| Atomic PVD (Brushed Gold/Gunmetal) | Standard Electroplated Chrome        |
+-----------------------+------------------------------------+--------------------------------------+
| Tile Joint Grouting   | Two-Part Resin Epoxy Grout         | Traditional White Cement Grout       |
+-----------------------+------------------------------------+--------------------------------------+
| Shower Glass Panels   | 8mm/10mm Toughened Safety Glass    | Annealed Sheet Glass, Acrylic Panels |
+-----------------------+------------------------------------+--------------------------------------+
| False Ceiling Grid    | Moisture-Resistant Calcium Board   | Commercial Untreated Gypsum Board    |
+-----------------------+------------------------------------+--------------------------------------+
Phase 4: Demolition, Civil & Plumbing Execution Checklist
The core engineering phase must follow a strict sequence. Deviating from this order can damage concealed lines or compromise surface finishes.
                 PLUMBING & SUBFLOOR STRUCTURE
+----------------------------------------------------------------------+
|  [Layer 5] Anti-Skid Vitrified Floor Tile (R10/R11 Slip Rating)      |
+----------------------------------------------------------------------+
|  [Layer 4] High-Flex Polymer-Modified Tile Adhesive                  |
+----------------------------------------------------------------------+
|  [Layer 3] Sloped Cementitious Screed Base (1:100 Gradient to Drain) |
+----------------------------------------------------------------------+
|  [Layer 2] 7-Layer Elastomeric Chemical Waterproofing Membrane        |
+----------------------------------------------------------------------+
|  [Layer 1] Concrete Base Slab (RCC) + Mortar Corner Coves            |
+----------------------------------------------------------------------+
Civil & Plumbing Inspection Tasks
- [ ] Site Isolation: Verify floor-to-ceiling zippered plastic dust curtains and hallway floor protection runners are installed before demolition.
- [ ] Stripping to Base Slab: Ensure old tiles, saturated mortar, corroded pipes, and cast-iron traps are stripped down to structural concrete.
- [ ] GI Pipe Extraction: Confirm all legacy metal water pipes buried in walls are extracted and replaced with SDR-11 CPVC or flexible PEX manifolds.
- [ ] 5-Bar Pressure Testing: Verify concealed water supply lines are capped and pressure-tested at 5 Bar for 24 hours before wall channels are plastered.
- [ ] Acoustic Waste Lines: Ensure 110mm soil and 75mm greywater drain lines use heavy-duty SWR PVC with 45-degree swept bends and deep-seal P-traps (50mm water seal).
Phase 5: The 7-Layer Waterproofing & Flood Testing Checklist
Waterproofing failure is the single leading cause of post-renovation structural damage. Homeowners must personally inspect each phase of this process.
+-------------------------------------------------------------------------------------------------+
|                                7-LAYER WATERPROOFING ARCHITECTURE                               |
+---+-----------------------------------+---------------------------------------------------------+
| # | Layer Type                        | Structural Purpose                                      |
+---+-----------------------------------+---------------------------------------------------------+
| 1 | Sub-Slab Crack Injection          | Micro-expanded non-shrink grout seals structural slab   |
| 2 | Deep Penetrating Primer           | Chemical bonding agent applied to bare concrete         |
| 3 | 1st Elastomeric Membrane Coat     | Polymer-modified cementitious slurry base layer          |
| 4 | Fiber Mesh Reinforcement          | Alkali-resistant mesh along all floor-to-wall joints    |
| 5 | 2nd Elastomeric Membrane Coat     | Cross-directional protective sealing coat               |
| 6 | Vertical Elevation Coving         | Waterproofing extended 7 feet up shower zone walls      |
| 7 | 72-Hour Water Ponding Test        | Slab flooded with 6" water to verify 100% leak-proof seal|
+---+-----------------------------------+---------------------------------------------------------+
The 72-Hour Water Pond Test Protocol
+-------------------------------------------------------------------------------+
|                       MANDATORY WATER PONDING PROTOCOL                        |
+-------------------------------------------------------------------------------+
| 1. Plug all floor drain traps securely using expansion plugs or test caps.    |
| 2. Build temporary 6-inch brick mortar retention dams across doorways.         |
| 3. Flood bathroom floor with water to a depth of 4 to 6 inches.               |
| 4. Mark standing water levels clearly on walls using waterproof markers.       |
| 5. Inspect water level daily for 72 continuous hours.                         |
| 6. Inspect adjacent bedroom walls and lower-floor ceilings for moisture marks.|
| 7. Sign off waterproofing certification only when zero drop occurs.           |
+-------------------------------------------------------------------------------+
Phase 6: Tiling, Cabinetry & Surface Finishes Checklist
Surface finishing transforms structural preparation into a clean, modern interior:
- [ ] Floor Slope Verification: Confirm floor screed is sloped at an exact 1:100 gradient toward linear trench or point drains using a spirit level.
- [ ] High-Flex Tile Adhesives: Confirm wall slabs and anti-skid floor tiles are set using polymer-modified tile adhesives (Laticrete or equivalent) rather than plain cement mortar.
- [ ] Non-Porous Epoxy Grout: Insist on two-part resin epoxy grout for all tile joints to prevent water absorption, soap scum buildup, and mold growth.
- [ ] 100% Waterproof Vanity Core: Inspect vanity construction to confirm core panels are 100% waterproof WPC or BWP Grade 710 marine plywood.
- [ ] Moisture-Resistant Ceiling: Ensure false ceilings use moisture-resistant calcium silicate boards with access trap doors for concealed geysers or valves.
Phase 7: Fixture Mounting, Electrical & Commissioning Checklist
Installing sanitaryware, faucets, and electrical appliances requires precise calibration to prevent leaks and electrical hazards:
- [ ] Concealed Tank Rigidity: Verify wall-hung WC steel mounting frames are rigidly anchored into wall masonry with zero deflection under weight.
- [ ] IP65 Water-Safe Electricals: Confirm all wiring inside wet zones is routed through sealed PVC conduits with fire-retardant copper conductors, protected by an RCCB breaker.
- [ ] PVD Faucet Calibration: Ensure thermostatic diverters and shower cartridges are flushed of debris before mounting decorative PVD handles.
- [ ] Silicone Perimeter Sealing: Apply anti-fungal sanitary silicone sealant around all vanity counter edges, WC bowl joints, and glass partition borders.
Phase 8: Final Quality Handover & Warranty Sign-Off Checklist
Do not release final contractor payment until every item on this quality handover verification checklist is confirmed:
+-------------------------------------------------------------------------------+
|                       FINAL QUALITY HANDOVER CHECKLIST                        |
+-------------------------------------------------------------------------------+
| [ ] 72-Hour Water Ponding Test certified with zero leakage on lower levels.   |
| [ ] Concealed supply pipelines pressure-tested at 5 Bar for 24 hours.          |
| [ ] Floor drainage verified with zero standing water or reverse slopes.       |
| [ ] All tile seams sealed with two-part resin epoxy grout.                    |
| [ ] Wall-hung WC tested with zero deflection under load.                      |
| [ ] Vanity built with 100% waterproof WPC / BWP 710 marine ply.               |
| [ ] All faucets, rain showers, and hand sprays calibrated for balanced flow.  |
| [ ] Written 10-Year Waterproofing Anti-Leakage Warranty document received.   |
| [ ] Written 10-Year Cabinetry Water-Swelling Warranty received.               |
| [ ] Original manufacturer warranty cards and tax invoices collected.           |
+-------------------------------------------------------------------------------+
Step-by-Step Stepwise Execution Schedule
Renovating a home bathroom requires a structured sequence across all trades:
1
1. Site Containment & Controlled Demolition
Days 1–3
1.1. Site Containment & Controlled Demolition:Days 1–3.
Set up zippered plastic dust barriers and floor runners along hallways. Strip old ceramic tiles, saturated mortar, corroded pipes, and fixtures down to bare structural concrete.
2
2. Concrete Remediation & Mortar Coving
Days 4–6
2.2. Concrete Remediation & Mortar Coving:Days 4–6.
Clean exposed concrete floor slabs, inject structural cracks with non-shrink polymer grout, and form 2×2 inch polymer mortar coves along floor-to-wall perimeters.
3
3. CPVC/PEX Manifolds & Electrical Wiring
Days 7–9
3.3. CPVC/PEX Manifolds & Electrical Wiring:Days 7–9.
Cut wall channels using dust-extracted diamond tools. Install SDR-11 CPVC or PEX supply lines, SWR PVC drain stacks, concealed thermostatic diverters, wall-hung WC frames, and IP65 electrical conduits.
4
4. 7-Layer Waterproofing & 72-Hour Pond Test
Days 10–12
4.4. 7-Layer Waterproofing & 72-Hour Pond Test:Days 10–12.
Apply dual coats of elastomeric polymer membrane over floor slabs and extend 7 feet up shower walls, reinforced with fiberglass mesh. Flood the floor for 72 hours to certify a leak-proof seal.
5
5. Screed Slope Engineering, Tiling & Epoxy Grouting
Days 13–16
5.5. Screed Slope Engineering, Tiling & Epoxy Grouting:Days 13–16.
Lay floor screed at a 1:100 fall gradient toward drains. Set large-format vitrified slabs using polymer adhesives and seal joints with non-porous two-part epoxy grout.
6
6. False Ceiling, Custom Vanity & Glass Assembly
Days 17–19
6.6. False Ceiling, Custom Vanity & Glass Assembly:Days 17–19.
Install moisture-resistant calcium silicate false ceilings with warm LED cove lighting. Mount custom 100% waterproof WPC vanities with quartz tops and 8mm toughened glass partitions.
7
7. Fixture Mounting, Pressure Testing & Final Handover
Days 20–21
7.7. Fixture Mounting, Pressure Testing & Final Handover:Days 20–21.
Mount branded CP brassware, wall-hung WCs, and rain shower heads. Pressure-test the plumbing system at 5 Bar, deep-clean the room, and perform final sign-off inspection.
Frequently Asked Questions (15 FAQs)
Q1: Why is a bathroom renovation checklist essential for homeowners?
Answer: A comprehensive checklist prevents expensive budget overruns, eliminates missing critical engineering steps (like 72-hour flood testing or pipe pressure checks), ensures correct trade sequencing, and protects against subfloor leaks and structural failure.
Q2: What is the average cost of a complete bathroom renovation?
Answer: A full bathroom renovation ranges from ₹75,000 to ₹1,30,000 for standard budget upgrades, ₹1,40,000 to ₹2,80,000 for mid-range custom transformations, and ₹3,00,000 to ₹7,50,000+ for luxury master suites featuring imported marble, digital thermostatic diverters, and smart automation.
Q3: How long does a full bathroom renovation project take?
Answer: A standard 40 to 60 sq. ft. bathroom renovation takes between 14 to 21 working days on-site. This includes civil stripping, concealed plumbing updates, a mandatory 72-hour waterproofing pond test, tile setting, false ceiling work, and fixture fitments.
Q4: What is the most critical technical step in a bathroom remodeling project?
Answer: Subfloor chemical waterproofing backed by a mandatory 72-hour standing water pond test. Failing to execute a proper elastomeric membrane setup causes subsurface water accumulation, lateral wall dampness, and ceiling damage in lower floors.
Q5: Should old Galvanized Iron (GI) concealed pipes always be replaced?
Answer: Yes. GI pipes over 10 to 15 years old corrode internally, restricting water pressure and shedding rust particles into tap water. Replacing GI lines with SDR-11 CPVC or flexible PEX piping is a mandatory checklist item.
Q6: How can homeowners verify if their waterproofing is truly leak-proof?
Answer: Perform a mandatory 72-hour water pond test. Block all floor drains, fill the floor with 4 to 6 inches of standing water, mark the water line, and inspect surrounding walls and lower-floor ceilings daily for any drop in level or damp marks.
Q7: What material is recommended for bathroom vanities to prevent water swelling?
Answer: Homeowners should strictly insist on 100% waterproof WPC (Wood Polymer Composite) boards or BWP Grade 710 marine plywood paired with quartz stone countertops. Avoid commercial MDF or particle board.
Q8: What is the recommended floor drainage slope for a bathroom?
Answer: A slope gradient of 1:100 (1 cm drop for every 100 cm of length toward the drain) is standard. This ensures rapid water runoff without creating unsafe foot slopes.
Q9: How do you choose between standard cement grout and epoxy grout?
Answer: Cement grout is porous, absorbing dirt, water, and hard water scale over time. Two-part resin epoxy grout is 100% non-porous, waterproof, stain-resistant, and easily washable, keeping tile joints clean for years.
Q10: How can I improve low shower water pressure during renovation?
Answer: Upgrade internal supply lines from 1/2-inch to 1-inch or 3/4-inch CPVC/PEX manifold loops, minimize sharp 90-degree elbows, and install an inline automatic pressure booster pump calibrated to 3.0–4.0 Bar.
Q11: Can an Indian squat toilet be converted to a modern wall-hung WC?
Answer: Yes. The raised brick platform is demolished, the 110mm SWR drain stack angle is re-engineered with 45-degree swept bends, an in-wall concealed cistern frame is anchored, the floor slab is screeded and waterproofed, and the Western WC is mounted.
Q12: What tile sizes make a compact bathroom look spacious?
Answer: Large-format vitrified tiles or porcelain slabs measuring 4×2 feet or 8×4 feet minimize grout lines, creating a continuous visual surface that expands the room’s apparent size.
Q13: How do I protect luxury faucets from hard water scaling?
Answer: Specify Physical Vapor Deposition (PVD) coated faucets in brushed gold or gunmetal, install point-of-use inline water softeners, apply hydrophobic nano-coatings on glass cubicles, and seal tiles with epoxy grout.
Q14: What electrical safety precautions are mandatory in wet bathroom zones?
Answer: All electrical lines must be routed inside IP65-rated sealed PVC conduits with fire-retardant copper wiring, protected by a dedicated Residual Current Circuit Breaker (RCCB) on the main distribution panel.
Q15: What written warranties should homeowners demand before final payment?
Answer: Demand a written 10-year anti-leakage warranty on waterproofing, a 10-year warranty against water swelling on custom WPC cabinetry, a 2-year service warranty on plumbing execution, and original manufacturer warranties on fittings.
Conclusion
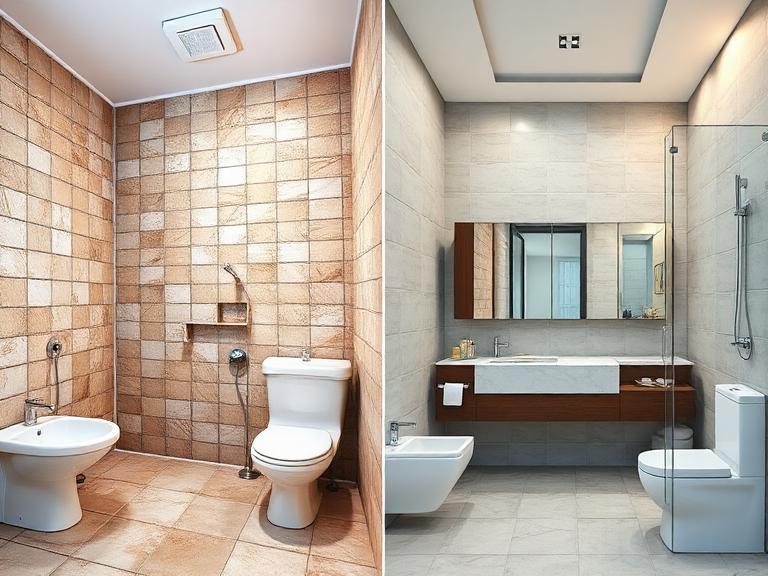
Renovating a bathroom is a rewarding investment when managed with structural discipline and technical precision. By following this comprehensive checklist—auditing infrastructure, specifying 100% waterproof materials, enforcing a 7-layer waterproofing protocol with 72-hour flood testing, and performing a rigorous handover inspection—you protect your home against future leaks and ensure a comfortable, durable, and luxurious space for decades to come.