Table of Contents
Ultimate Bathroom Renovation Checklist: Complete Step-by-Step Guide
A bathroom renovation is one of the most transformative home improvement projects you can undertake. It elevates daily personal wellness, restores structural integrity, and delivers one of the highest returns on investment in residential real estate. However, because a bathroom concentrates complex plumbing, high-voltage electrical lines, precise waterproofing, and heavy tile work into a compact space, an unorganized renovation can quickly devolve into budget overruns, structural leaks, and costly delays.
Whether you are updating an outdated builder-grade master bath, remodeling a compact guest restroom, or executing a high-rise apartment transformation, success requires a systematic, phase-by-phase execution blueprint.
This comprehensive Bathroom Renovation Checklist serves as an end-to-end master strategy. It guides you from preliminary spatial budgeting and MEP (Mechanical, Electrical, and Plumbing) engineering through structural waterproofing, tile selection, fixture assembly, and final quality assurance audits.
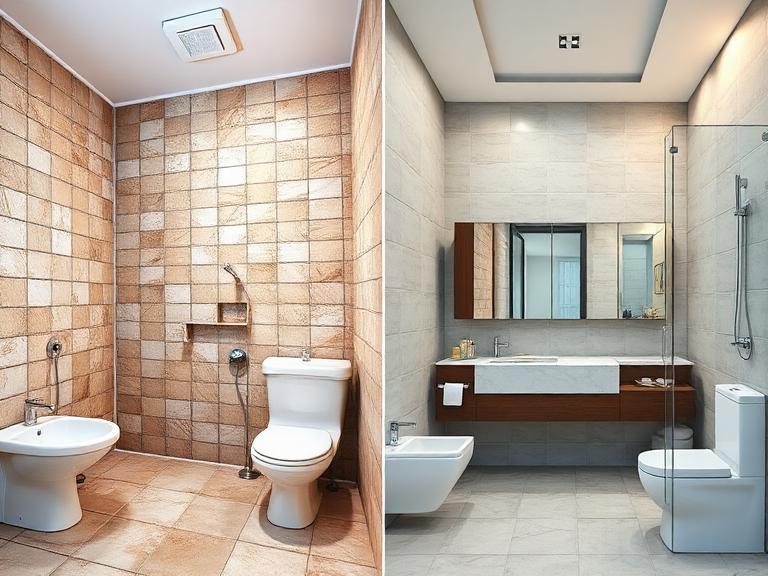
Phase 1: Pre-Planning, Budgeting & Spatial Audits
Before touching a single wall tile or demolishing a vanity, you must conduct a thorough spatial audit and define clear financial parameters. Skipping pre-planning is the primary cause of mid-project cost spikes and structural layout failures.
┌────────────────────────────────────────────────────────┐
│             PRE-PLANNING & AUDIT FLOWCHART             │
├───────────────────┬───────────────────┬────────────────┤
│ 1. SPATIAL MEASURE│ 2. MEP LOCATION   │ 3. BUDGET      │
│    & CLEARANCES   │    MAPPING        │    ALLOCATION  │
├───────────────────┼───────────────────┼────────────────┤
│ Wall Dimensions   │ Soil Stack Points │ 40% Civil/Tiles│
│ Door Swing Radius │ Electrical Lines  │ 35% Fixtures   │
│ Floor-to-Ceiling  │ Exhaust Ducting   │ 15% Labor      │
│ Height            │ Water Inlet Drops │ 10% Contingency│
└───────────────────┴───────────────────┴────────────────┘
1. Spatial Measurement & Ergonomic Clearance Audit
- [ ] Floor Plan Dimensions: Record exact measurements of all walls, ceiling heights, door openings, and window frames down to the millimeter.
- [ ] Door Swing Radii: Confirm that incoming door swings clear vanities, towel bars, and glass partitions without obstruction.
- [ ] Fixture Clearances: Verify standard ergonomic clearances across the layout:
- Minimum 15 inches (38 cm) clearance from the center of the toilet bowl to any side wall or vanity.
- Minimum 21 inches (53 cm) clear floor space in front of the toilet bowl and vanity.
- Minimum shower enclosure dimensions of 36×36 inches (90×90 cm) for comfortable daily movement.
- [ ] Vertical Heights: Map mirror centers (typically 5 feet 6 inches from the finished floor level), shower head outlets (7 feet from the finished floor level), and counter vanity tops (34 to 36 inches finished height).
2. MEP (Mechanical, Electrical, and Plumbing) Asset Mapping
- [ ] Main Soil Line Identification: Locate the position of the primary waste soil drop stack. Note whether shifting the toilet bowl requires a raised step or an offset drain pan.
- [ ] Water Supply Inlet Pressure: Test static water inlet pressure. High-pressure zones require pressure-reducing valves (PRVs); low-pressure lines require inline booster pumps for rain shower systems.
- [ ] Exhaust Duct Access: Inspect current ventilation routing to ensure exhaust fans discharge directly outdoors or into designated building vent shafts rather than drop-ceiling cavities.
- [ ] Electrical Distribution: Map existing circuit breakers to confirm the bathroom branch line can handle high-draw appliances (such as 3KW instant water heaters, heated towel rails, or smart bidet seats).
3. Financial Allocation & Contingency Planning
- [ ] Line-Item Budget Breakdown: Allocate your total renovation capital across essential categories:
- 40% Civil & Surface Materials: Demolition, floor screeding, waterproofing, tiles, epoxy grout, and wall plastering.
- 35% Fixtures & Fittings: Sanitaryware, faucets, thermostatic valves, shower enclosures, vanities, and mirrors.
- 15% Skilled Trade Labor: Specialized tile masons, certified plumbers, electricians, and painters.
- 10% Mandatory Contingency Fund: Set aside cash reserves specifically for hidden floor rot, concealed plumbing corrosion, or structural wall leveling corrections discovered during demolition.
Phase 2: Design, Style & Material Specifications
The longevity of a bathroom depends entirely on selecting materials designed for continuous high-humidity environments. Never specify residential materials meant for dry living areas inside a wet bathroom zone.
+----------------------------------------------------------------------------------------------------+
|                         MATERIAL & SPECIFICATION CHOICE MATRIX                                     |
+----------------------------------------------------------------------------------------------------+
| COMPONENT              | RECOMMENDED HIGH-PERFORMANCE CHOICE | CHOICE TO AVOID                      |
+------------------------+-------------------------------------+--------------------------------------+
| Wall & Floor Surfaces  | Porcelain Slabs or Vitrified Tiles  | Natural Limestone / Unsealed Marble  |
+------------------------+-------------------------------------+--------------------------------------+
| Joint Filler           | 100% Epoxy Resin Grout              | Standard Porous Cement Grout         |
+------------------------+-------------------------------------+--------------------------------------+
| Vanity Core Structure  | Marine-Grade BWR Plywood or HDMR    | Commercial Particle Board / MDF      |
+------------------------+-------------------------------------+--------------------------------------+
| Plumbing Fixture Finish| PVD Titanium-Coated Matte or Gold   | Low-Grade Thin Chrome Electroplating |
+------------------------+-------------------------------------+--------------------------------------+
| Shower Glass           | 10mm Toughened Glass + Nano-Sealant | Standard 6mm Annealed Float Glass    |
+------------------------+-------------------------------------+--------------------------------------+
1. Tile & Stone Selection
- [ ] Floor Slip Resistance: Ensure floor tiles carry an anti-skid rating of at least R10 or dynamic coefficient of friction (DCOF) greater than 0.42 to prevent slipping when wet.
- [ ] Tile Density & Absorption: Select porcelain or vitrified tiles with a water absorption rate under 0.5% for floor surfaces and wet shower walls.
- [ ] Large-Format Slabs: Specify large porcelain panels (such as 4×8 ft or 2×4 ft) to minimize grout line density by up to 80%, creating a clean, modern aesthetic that is much easier to sanitize.
- [ ] Joint Grouting Material: Always specify 100% epoxy resin grout for wet shower zones and floor areas. Unlike cementitious grout, epoxy grout is completely non-porous, waterproof, stain-proof, and immune to mold growth.
2. Sanitaryware & Fixture Specifications
- [ ] Toilets & Cisterns: Select wall-hung, rimless commodes paired with concealed in-wall cistern tanks. Rimless bowls eliminate hidden flush traps where bacteria accumulate, while concealed tanks free up floor space.
- [ ] Thermostatic Shower Mixers: Choose thermostatic shower valves over basic mechanical mixers. Thermostatic valves maintain water temperature within 1 degree, preventing thermal shock or scalding when water pressure fluctuates elsewhere in the home.
- [ ] PVD Fixture Finishes: Specify Physical Vapor Deposition (PVD) finishes (brushed nickel, rose gold, matte black) for taps and shower heads. PVD coatings are molecularly bonded, rendering them highly resistant to scratch damage and hard-water mineral corrosion.
- [ ] Glass Shower Partitions: Choose 8mm or 10mm thermally toughened safety glass paired with SS 304 anti-rust mounting hardware. Require factory-applied hydrophobic nano-coatings to prevent mineral scale etching.
3. Cabinetry & Countertop Engineering
- [ ] Core Vanity Substrate: Ensure vanity cabinets are constructed exclusively from High-Density High-Moisture Resistance (HDMR) boards or BWR (Boiling Water Resistant) marine-grade plywood. Ban particle board or standard MDF.
- [ ] Countertop Surfaces: Select non-porous engineered quartz, solid acrylic surfaces, or natural granite. Avoid unsealed porous marble, which stains easily when exposed to soapy water and cosmetic oils.
- [ ] Hardware & Hinges: Specify SS 304 soft-close hinges, full-extension undermount drawer slides, and concealed finger-pull grooves to eliminate protruding metal handles in narrow spaces.
Phase 3: High-Rise, Municipal & RWA Approvals
Executing civil work inside multi-story apartment buildings or regulated housing developments involves complex compliance requirements. Failing to obtain formal permissions can result in heavy municipal fines, work-stoppage notices, or disputes with neighbors.
┌────────────────────────────────────────────────────────┐
│              COMPLIANCE & PERMIT CHECKLIST             │
├───────────────────┬───────────────────┬────────────────┤
│ RWA / FACILITY    │ DEBRIS & LIFT     │ STRUCTURAL &   │
│ PERMIT APPROVAL   │ LOGISTICS PLAN    │ NOISE RULES    │
├───────────────────┼───────────────────┼────────────────┤
│ Formal Application│ Padded Lifts      │ No Structural  │
│ Security Deposit  │ Sealed Trash Bags │ Core-Cutting   │
│ Worker Entry IDs  │ Off-Site Carting  │ Approved Hours │
└───────────────────┴───────────────────┴────────────────┘
1. Society & RWA Compliance
- [ ] Work Permit Filings: Submit formal renovation applications to your Resident Welfare Association (RWA) or building facility management office alongside detailed floor plans.
- [ ] Security Deposit: Pay necessary refundable security deposits to cover potential damage to shared community elevators, corridors, or common assets.
- [ ] Contractor Passes: Issue gate entry passes, photo identification cards, and emergency contact details for all site supervisors, plumbers, electricians, and laborers.
2. Site Logistics & Protection
- [ ] Service Elevator Protection: Line service elevator interiors with heavy-duty corrugated plastic sheets, foam padding, or plywood sheets during the entire transport period for heavy civil supplies.
- [ ] Corridor Pathway Masking: Lay self-adhesive floor protection film across common corridor carpets or tiles leading from the service elevator directly to your apartment entrance.
- [ ] Dust Isolation Barriers: Erect floor-to-ceiling plastic zip-wall barriers inside your apartment entrance to isolate civil dust, concrete chips, and tile shavings from living quarters.
3. Civil Work & Noise Constraints
- [ ] Approved Working Hours: Schedule noisy civil work (chiseling, tile cutting, drilling) strictly within approved hours (typically 9:00 AM to 5:00 PM on weekdays). Stop all loud work on weekends and public holidays.
- [ ] Core-Cutting Prohibitions: Confirm that no contractor cuts into structural concrete columns, post-tensioned floor slabs, or load-bearing shear walls. Reroute drain pipes horizontally rather than cutting structural concrete.
- [ ] Debris Bagging & Carting: Require contractors to pack civil waste in heavy-duty woven bags. Schedule debris removal via covered trucks during approved off-peak hours.
Phase 4: Demolition & Rough Plumbing (MEP Phase)
With permissions secured and dust barriers erected, demolition can safely begin. The demolition phase removes old finishes down to the bare structural slab, exposing hidden utility lines for complete MEP replacement.
[ Step 1: Strip Finishes to Bare Slab ] ──> [ Step 2: Run New CPVC/PEX & Soil Pipes ]
                                                              │
[ Step 4: Complete Electrical Conduits ] <── [ Step 3: Install Concealed Diverters ]
1. Controlled Demolition Protocol
- [ ] Utility Shutoff: Turn off main water isolator valves and shut off electrical breaker switches dedicated to the bathroom before starting work.
- [ ] Controlled Chisel Stripping: Carefully strip old wall and floor tiles using low-vibration electric chisels to prevent cracking the shared brickwork of adjacent bedrooms or neighboring flats.
- [ ] Screed Removal: Strip old floor concrete down to the bare structural slab. Inspect bare concrete for pre-existing micro-fissures, structural settlement cracks, or water dampness.
- [ ] Waste Stack Capping: Immediately plug open floor drain outlets and soil pipes with rubber expanding plugs or temporary plastic caps to block civil concrete debris from choking primary building drainage lines.
2. Rough Plumbing Installation
- [ ] Piping Material Upgrade: Replace old galvanised iron or standard PVC pipes with heavy-duty CPVC (Chlorinated Polyvinyl Chloride) or PEX (Cross-linked Polyethylene) piping rated for hot and cold pressure distribution.
- [ ] Concealed Valves & Diverters: Anchor concealed shower diverter valves, thermostatic controls, and wall-mounted basin rough-ins securely inside wall chases using solid masonry plaster rather than loose wire ties.
- [ ] Drain Slopes & Channels: Lay new floor waste collection pipes with a continuous, unyielding downward slope of at least 1:50 (1/4 inch fall per linear foot) toward the main vertical drainage drop stack.
- [ ] Hydrostatic Pressure Testing: Conduct a hydrostatic pressure test on all new concealed water supply lines. Cap all outlets, pressurize pipes to 100–150 PSI (1.5x working pressure) using a manual hydraulic pump, and monitor the gauge for 24 hours to prove zero pressure drop before closing wall chases.
3. Electrical & Exhaust Rough-In
- [ ] Concealed Conduits: Run heavy-duty PVC electrical conduits along wall chases. Ensure low-voltage lines (sensor mirror cables, LED strip wiring) run in separate conduits from high-voltage lines (geysers, heater pumps).
- [ ] Safety Earthing & GFCI Protection: Install dedicated earthing wires for all metallic components. Ensure every bathroom outlet connects to a Ground Fault Circuit Interrupter (GFCI) or Residual Current Circuit Breaker (RCCB) rated at 30mA trip speed to prevent electrical shocks.
- [ ] Exhaust Fan Outlet: Install high-CFM inline duct fans or wall-mounted exhaust units. Route rigid PVC or flexible aluminum ducting directly through external wall openings or building air shafts equipped with backdraft dampers.
Phase 5: Advanced Multi-Layer Waterproofing
Waterproofing is the single most critical structural phase of a bathroom renovation. Tile and grout surfaces are water-resistant, but they are not completely waterproof. High-grade liquid waterproofing applied beneath the tile layer is your primary defense against costly floor leaks.
+----------------------------------------------------------------------------------------------------+
|                          WATERPROOFING SYSTEM LAYER ARCHITECTURE                                   |
+----------------------------------------------------------------------------------------------------+
| LAYER POSITION         | MATERIAL SPECIFICATION             | FUNCTION                             |
+------------------------+------------------------------------+--------------------------------------+
| Layer 1: Base Concrete | Primer / Slurry Bond Coat          | Seals surface dust & micro-pores     |
+------------------------+------------------------------------+--------------------------------------+
| Layer 2: Joint Corners | Glass-Fiber Mesh Fabric Reinforce  | Prevents cracking from wall movement |
+------------------------+------------------------------------+--------------------------------------+
| Layer 3: Main Membrane | 2-3 Coats Liquid Elastomeric / PU  | Forms seamless, flexible water barrier|
+------------------------+------------------------------------+--------------------------------------+
| Layer 4: Protection    | Fiber-Reinforced Screed Slope      | Protects membrane & directs flow     |
+------------------------+------------------------------------+--------------------------------------+
1. Surface Preparation & Corner Coving
- [ ] Substrate Cleaning: Vacuum the bare floor slab completely to eliminate loose dust, sand particles, and oil residue that impede membrane bonding.
- [ ] Polymer Mortar Fillets (Coving): Form 2×2 inch concave angled fillets using polymer-modified repair mortar along all 90-degree junctions where walls meet the floor slab. Liquid membranes will crack if applied over sharp 90-degree corners.
- [ ] Pipe Flange Sealing: Seal spaces around floor drain pipes and sanitary stub-outs using flexible polyurethane elastomeric sealant before applying overall floor coatings.
2. Liquid Membrane Application
- [ ] Membrane Choice: Select high-performance 2-component polymer-modified cementitious coatings or continuous liquid-applied Polyurethane (PU) elastomeric membranes.
- [ ] Reinforcement Fabric Integration: Embed alkali-resistant glass-fiber mesh fabric (145 GSM) into the wet first layer across all floor-to-wall junctions, pipe penetrations, and floor drains to prevent tearing caused by structural shifting.
- [ ] Vertical Wall Upturn (Tanking): Extend liquid waterproofing continuously across the entire floor slab and up wall surfaces to a minimum height of:
- 7 feet (2.1 meters) inside enclosed shower stalls and bath zones.
- 18 inches (45 cm) above finished floor levels across all dry vanity and toilet zones.
- [ ] Multi-Coat Curing: Apply a minimum of two to three coats perpendicular to each other, allowing full curing time between applications to achieve a continuous, pinhole-free dry film thickness (DFT) of at least 1.5mm to 2.0mm.
3. Mandatory Hydrostatic Flood Testing
- [ ] Drain Plugging: Seal all floor drain traps securely using inflatable rubber test plugs or mechanical expansion caps.
- [ ] Water Ponding: Fill the entire bathroom floor with clean water to a depth of 2 to 3 inches (5 to 7.5 cm). Mark the exact water level line on wall tiles with tape.
- [ ] 72-Hour Duration Test: Leave the ponded water undisturbed for at least 42 to 72 hours.
- [ ] Under-Slab Inspection: Inspect ceilings and walls of rooms directly beneath the bathroom for signs of dampness, water spots, or moisture meter spikes. Proceed with screeding and tiling only after confirming zero leaks and zero drop in water height (accounting for minor natural evaporation).
[ Step 1: Vacuum Base Slab ] ──> [ Step 2: Form 90-Deg Corner Fillets ]
                                                      │
[ Step 4: 72-Hr Water Ponding Test ] <── [ Step 3: Apply 3 Coats PU Membrane ]
Phase 6: Tiling, Grouting & Ceiling Assembly
Tiling transforms your waterproofing prep into a polished aesthetic space. Precision alignment, full mortar coverage, and flexible epoxy grouting are essential for creating a flat, crack-free finish.
┌────────────────────────────────────────────────────────┐
│               TILING & GROUTING BLUEPRINT              │
├───────────────────┬───────────────────┬────────────────┤
│ 1. ADHESIVE       │ 2. TILE MAPPING   │ 3. 100% EPOXY  │
│    SPREADING      │    & LEVELING     │    GROUTING    │
├───────────────────┼───────────────────┼────────────────┤
│ Polymer C2TE Mortar│ Center Laser Lines│ Stain-Proof    │
│ Both-Sided Butter │ Tile Leveling Clips│ Chemical Wash  │
│ 95%+ Wet Coverage │ 2mm Expansion Gap │ Zero Porosity  │
└───────────────────┴───────────────────┴────────────────┘
1. Tile Layout & Mortar Application
- [ ] Laser-Guided Layout Mapping: Project cross-line laser levels on walls to ensure tile joints align seamlessly across floor and wall junctions. Center layout cut-outs so edge tiles are at least half a tile wide.
- [ ] High-Bond Adhesive Selection: Use polymer-modified tile adhesives rated C2TE or higher (such as Laticrete or Roff). Avoid traditional thin cement mortar slurry, which releases from large-format porcelain slabs over time.
- [ ] Back-Buttering Method: Apply adhesive using notched trowels to both the wall substrate and the back of every tile (back-buttering). Ensure at least 95% wet mortar coverage under every tile to eliminate hollow air pockets that crack under weight.
- [ ] Tile Leveling Systems: Use mechanical tile leveling clips and wedges for all tiles larger than 12×12 inches to eliminate lip edges and guarantee perfectly flat joints.
2. Tile Joint Spacing & Epoxy Grouting
- [ ] Minimum Joint Spacing: Install flexible tile spacers to maintain uniform joint gaps of at least 2mm for internal walls and 3mm for floor slabs. Never butt-joint tiles without spaces; structural shifting will cause tile edges to chip and tent.
- [ ] Epoxy Grout Filling: Pack tile joints completely with 2-component or 3-component 100% epoxy grout using firm rubber floats. Work diagonally across joint intersections to avoid scooping out wet grout.
- [ ] Chemical Cleaning & Wash: Wipe away excess epoxy film from tile faces within 30 to 45 minutes using specialized initial wash sponges and neutral emulsion cleaners before the resin hardens into an indelible haze.
3. Ceiling & Overhead Assembly
- [ ] Moisture-Resistant Framing: Construct ceiling drop grids using zinc-coated galvanized steel channels (GI framing). Avoid wood framing, which warps under high humidity.
- [ ] Board Specifications: Sheathe ceiling frames using 12.5mm moisture-resistant green gypsum boards, calcium silicate panels, or waterproof PVC ceiling planks.
- [ ] Access Trap Doors: Cut framed inspection access hatches (minimum 18×18 inches) directly below concealed geysers, motor valves, or drain traps to allow future servicing without breaking the ceiling.
Phase 7: Fixture Installation & Final Quality Audit
The final stage involves mounting high-end sanitaryware, vanity furniture, glass partitions, and electrical trims, followed by a comprehensive system performance test.
[ Step 1: Mount Sanitaryware & Vanities ] ──> [ Step 2: Install Glass Partitions ]
                                                              │
[ Step 4: System Audit & Sign-off ] <── [ Step 3: Apply Silicone Sealants ]
1. Fixture & Glass Installation
- [ ] Sanitaryware Mounting: Hang wall-mounted toilets securely on concealed in-wall carrier frames using rubber insulation gaskets. Ensure flush pipe seals are seated correctly to prevent dry-flush leaks.
- [ ] Vanity Anchor Verification: Secure heavy floating vanities into solid wall masonry using expansion anchor bolts. Confirm tops are perfectly level using spirit levels before attaching basins.
- [ ] Glass Partition Support: Anchor frameless shower glass panels using heavy-duty SS 304 wall brackets and header support bars. Confirm glass panels sit suspended 2mm off tile floors on rubber setting blocks rather than resting directly on hard tiles.
2. Perimeter Sealing & Electrical Trims
- [ ] Sanitary Silicone Caulking: Apply premium neutral-cure anti-fungal silicone sealant along all gaps between wall tiles and vanities, basin rims, mirror edges, and toilet bowls. Never use standard rigid grout or acrylic caulk, which cracks under movement.
- [ ] Electrical Plate Mounting: Mount waterproof IP44-rated switch covers and GFCI socket plates securely against wall tiles.
- [ ] Lighting & Mirror Connections: Connect anti-fog mirror heating pads and low-voltage LED strip transformers inside sealed waterproof junction boxes hidden above the drop ceiling.
3. Final Pre-Handover Quality Assurance Audit
- [ ] Drain Flow & Slope Test: Pour multi-gallon buckets of water across all floor corners to confirm water drains quickly toward floor traps without pooling anywhere.
- [ ] Shower Enclosure Water Test: Spray high-pressure water directly against glass partition joints and door seals for 10 minutes to verify zero water escapes into the dry vanity zone.
- [ ] Plumbing Pressure Check: Run all faucets, rain showers, and hand sprays simultaneously for 15 minutes. Inspect concealed trap joints, flex hoses, and diverter valves using dry paper towels to confirm zero micro-weeping.
- [ ] Electrical Safety Isolation Test: Trip the test button on the dedicated RCCB/GFCI breaker panel to confirm it cuts circuit power instantly within milliseconds.
- [ ] Final Chemical Deep Cleaning: Clean all porcelain slabs, glass panels, and PVD fixtures using non-acidic, pH-neutral cleaners to remove remaining dust and silicone residues.
Complete Renovation Itemized Budget Matrix
Use this master financial matrix to project real-world expenses across different bathroom renovation tiers.
+----------------------------------------------------------------------------------------------------+
|                         COMPLETE RENOVATION BUDGET MATRIX (2026 ESTIMATES)                         |
+--------------------------+-------------------------+-----------------------+-----------------------+
| COST ELEMENT             | ESSENTIAL TIER          | PREMIUM TECH TIER     | ULTRA-LUXURY SPA TIER |
+--------------------------+-------------------------+-----------------------+-----------------------+
| Civil Demolition & Trash | $300 – $500             | $600 – $900           | $1,000 – $1,800       |
+--------------------------+-------------------------+-----------------------+-----------------------+
| Waterproofing Systems    | $250 – $400             | $500 – $800           | $1,000 – $1,600       |
+--------------------------+-------------------------+-----------------------+-----------------------+
| Plumbing Rough-In & MEP  | $400 – $700             | $800 – $1,400         | $1,800 – $3,200       |
+--------------------------+-------------------------+-----------------------+-----------------------+
| Wall & Floor Tiles       | $500 – $900             | $1,200 – $2,500       | $3,500 – $7,000       |
+--------------------------+-------------------------+-----------------------+-----------------------+
| Tile Installation Labor  | $400 – $700             | $800 – $1,500         | $2,000 – $4,000       |
+--------------------------+-------------------------+-----------------------+-----------------------+
| Sanitaryware & Fixtures  | $600 – $1,200           | $1,800 – $3,500       | $4,500 – $10,000+     |
+--------------------------+-------------------------+-----------------------+-----------------------+
| Glass Shower Partition   | $200 – $350             | $450 – $850           | $1,200 – $2,500       |
+--------------------------+-------------------------+-----------------------+-----------------------+
| Custom Vanity & Cabinet  | $300 – $600             | $800 – $1,600         | $2,200 – $4,500       |
+--------------------------+-------------------------+-----------------------+-----------------------+
| Ceiling & Lighting       | $200 – $350             | $400 – $750           | $900 – $1,800         |
+--------------------------+-------------------------+-----------------------+-----------------------+
| ESTIMATED TOTAL RANGE    | $3,150 – $5,700         | $7,350 – $13,800      | $19,100 – $36,400+    |
+--------------------------+-------------------------+-----------------------+-----------------------+
Post-Renovation Maintenance Schedule
To keep your newly renovated bathroom looking pristine and operating reliably for decades, follow this preventative maintenance calendar:
+----------------------------------------------------------------------------------------------------+
|                         PREVENTATIVE BATHROOM MAINTENANCE CALENDAR                                 |
+------------------------+------------------------------------+--------------------------------------+
| FREQUENCY              | TARGET COMPONENT                   | RECOMMENDED ACTION                   |
+------------------------+------------------------------------+--------------------------------------+
| Daily                  | Glass Partitions & Tiles           | Squeegee standing water after showers|
+------------------------+------------------------------------+--------------------------------------+
| Weekly                 | PVD Taps & Acrylic Surfaces        | Clean with pH-neutral soap & microfiber|
+------------------------+------------------------------------+--------------------------------------+
| Monthly                | Aerators & Shower Nozzles          | Descale in vinegar to clear mineral deposits|
+------------------------+------------------------------------+--------------------------------------+
| Every 6 Months         | Floor Traps & Trench Drains        | Clear hair traps & flush drain lines |
+------------------------+------------------------------------+--------------------------------------+
| Annually               | Perimeter Joints & Silicone        | Inspect sealant & re-caulk if peeling|
+------------------------+------------------------------------+--------------------------------------+
Frequently Asked Questions (15 Detailed FAQs)
Q1: How long does a full bathroom renovation take from start to finish?
A standard residential bathroom renovation typically takes 14 to 21 working days. Complex custom renovations—involving floor layout changes, large-format porcelain slabs, imported thermostatic valves, or strict apartment building work hours—take 21 to 35 working days.
Q2: What is the single most important step in a bathroom renovation?
Multi-layer liquid waterproofing combined with a 72-hour hydrostatic flood test is the most critical step. Tile and grout surfaces are water-resistant, but they are not completely waterproof. Unnoticed under-slab leaks destroy floor screeds, ruin ceilings in rooms below, and lead to massive structural repair bills.
Q3: How much contingency money should I set aside in my budget?
Set aside a dedicated 10% to 15% contingency reserve above your primary contract estimate. Demolition frequently exposes hidden defects—such as corroded cast-iron pipes, wet floor screeds, unsafe electrical wiring, or unlevel structural brickwork—that require immediate correction.
Q4: Can I tile directly over existing bathroom tiles to save time and money?
While tile-over-tile installation is technically possible using high-bond specialized adhesives, complete demolition is strongly recommended. Stripping old finishes lets you inspect the structural concrete slab, replace aging plumbing lines, upgrade electrical runs, and apply a fresh, unbroken layer of liquid waterproofing directly to the base structure.
Q5: What is the difference between cementitious grout and epoxy grout?
Traditional cementitious grout is porous, absorbs dirty water, stains easily, and fosters black mold growth over time. Epoxy grout is composed of epoxy resins and silica filler. It is 100% non-porous, completely waterproof, stain-resistant, and immune to chemical degradation, making it ideal for wet shower floors.
Q6: How high should waterproofing extend up bathroom walls?
Waterproofing should cover the entire floor slab and extend up walls to a height of at least 7 feet (2.1 meters) inside enclosed shower stalls and bath zones. Across dry vanity and toilet areas, wall waterproofing should extend at least 18 inches (45 cm) above the finished floor level.
Q7: What electrical safety devices are mandatory in a wet bathroom?
Every bathroom electrical circuit must connect to a dedicated Ground Fault Circuit Interrupter (GFCI) or Residual Current Circuit Breaker (RCCB) rated at a 30mA trip speed. All light fixtures, switches, and mirror circuits inside wet zones must carry an IP44 moisture-protection rating or higher.
Q8: How can I prevent high-rise apartment neighbors from complaining about civil noise?
Provide written notice to your Resident Welfare Association (RWA) and immediate floor neighbors at least 3 days before work starts. Limit noisy civil work strictly to approved hours (typically 9:00 AM to 5:00 PM on weekdays), pad service elevator walls, and seal entrance doorways with floor-to-ceiling plastic dust barriers.
Q9: Why is PVD-coated hardware better than standard chrome electroplating?
Physical Vapor Deposition (PVD) bonds finish coatings to base metals at a molecular level inside a vacuum chamber. PVD finishes (matte black, brushed nickel, gold) are significantly harder, highly scratch-resistant, and stand up far better against harsh hard-water mineral scaling than standard electroplated chrome finishes.
Q10: How do I choose the right size exhaust fan for my bathroom?
Calculate your bathroom volume in cubic feet (Length x Width x Height in feet). A reliable exhaust fan should cycle total air volume 8 to 10 times per hour. As a rule of thumb, select an exhaust fan rated for at least 1 CFM per square foot of bathroom floor area (e.g., a 70 CFM fan for a 70 sq ft bathroom).
Q11: What tile material is best for bathroom floors to prevent slipping?
Select porcelain or vitrified tiles featuring an anti-skid surface finish with a pendulum test value or skid rating of R10 or higher (DCOF > 0.42). Avoid highly polished, glossy floor tiles, which become dangerously slick when wet.
Q12: Can I shift my toilet bowl to a different location during a remodel?
Yes, but shifting a toilet bowl depends on your building’s plumbing setup. In high-rise apartments where you cannot drill through concrete floor slabs, moving a toilet requires running new waste lines above the slab using a raised floor step or an offset drain pan connected to the main drop stack.
Q13: What substrate material should be used to build custom vanity cabinets?
Build vanity cabinets exclusively from High-Density High-Moisture Resistance (HDMR) board or BWR (Boiling Water Resistant) marine-grade plywood. Avoid commercial particle boards or standard MDF, which swell and disintegrate when exposed to humid bathroom air or small plumbing leaks.
Q14: How do I protect glass shower screens from hard-water stains?
Request factory-applied hydrophobic nano-coatings on toughened glass panels during purchase. Daily, use a silicone rubber floor squeegee to wipe down wet glass after showers. Monthly, clean glass faces using pH-neutral sprays or mild vinegar solutions.
Q15: What is the ideal floor slope for proper bathroom water drainage?
Ensure floor screeds slant toward floor drain traps with a smooth, continuous drop of 1:50 to 1:60 (approximately 1/4 inch fall per linear foot). This slope ensures surface water drains quickly into floor outlets without pooling around vanity bases or door thresholds.